
WALKING AND MAPPING YOUR NEIGHBORHOOD
Summary:
This program inspires teachers to take their classes on walking tours in the vicinity of their schools, concentrating on specific environmental themes, such as nature, trees, pollution, landmark buildings, statues, and historical architecture. After selecting a theme and learning about basic cartography, classes map their walking tours and prepare written descriptions. The lesson plans are excerpted from a complete Environmental Education program created by Mike Zamm for the Council on the Environment of New York City. They can be used in any urban or suburban neighborhood and adapted for elementary or intermediate grades.
Standards:
The program provides teachers with a multi-disciplinary unit of environmental education. It meets New York State Education Department learning standards for science, mathematics and technology (SMT) and can also serve social studies and language arts curriculum goals. Walking and mapping activities can be combined with service learning and used by preservation and conservation organizations, historical societies, art museums and nature centers in their community education programs.
Objectives:
Students will understand and apply scientific concepts, principles and theories pertaining to the physical setting and living environment, and recognize the historical development of ideas in science; Students will apply technological knowledge and skills to design, construct, use and evaluate products and systems to satisfy human and environmental needs; Students will apply the knowledge and thinking skills of mathematics, science and technology to address real-life problems and make informed decisions.
Lessons:
Lesson One: Choosing a Theme for Our Environmental WalksLesson Two: Learning About Maps
Lesson Three: Actual Walk Related to the Theme
Lesson Four: Completing Maps
Lesson Five: Adding a Page of Explanations to the Maps
LESSON ONE: Choosing a Theme for Our Environmental Walks
What kinds of places would you like to walk to in order to learn more about our neighborhood environment? (Make a list on the blackboard and have the children copy it in their notebooks.)
Sample Themes
|
Historical 1. Historical architecture2. Revolutionary war sites 3. Landmark buildings 4. Statues Nature 1. Tree identification2. Plants 3. Animal life 4. Soil composition 5. Geological formation 6. Vegetation survey Pollution Sources 1. Noise2. Air 3. Water 4. Solid Waste Cultural Sites 1. Ethnic stores2. United Nations missions 3. Museums 4. Art galleries 5. Religious architecture |
Community Services 1. Hospitals2. Schools 3. Fire stations Community - Urban Design 1. Art deco buildings2. Rehabilitated buildings 3. Abandoned buildings 4. Interesting architectural structures, forms, and uses of space 5. Planning maps 6. Community gardens Environmental Materials - Substances that constitute the urban environment 1. Metals2. Wood 3. Slate 4. Marble Natural Resources Areas 1. Reservoirs 2. Beaches Social Indicators 1. Population density and breakdown2. Social problems 3. Crime frequency and type |
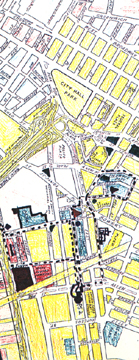
Students may be given an outline map or make their own, using local GIS or Internet mapping resources, such as the TIGER Census Browser. A teacher-led discussion might progress through the following questions:
1. What is this? (Hold up the map.)
2. Show the students the proper way to place the map on their desks.
3. Who can point to the hospital on the map?
4. On what streets is the hospital located?
5. In what part of the neighborhood is the church between Beverly Road and Albemarle Road located? (Northern; point out the directional diagram to the children.)
6. Which places on the map are in the southern part?
7. Summary question: What are maps used for? (To find out where places are and how to get to them.)
8. Let's pick what kinds of symbols (if symbols are needed for your theme) we will be using on the walk. Develop a key with the class. Have the class write these symbols in their notebooks so they can refer to them during the walk. (Note: The Green Maps project has developed a set of symbols you may want to use.)
Follow-up Activity:
Ask the children to count the number of leg spans or steps it takes to go from one neighborhood place to another - assign individual students to measure distances in this manner between specific neighborhood spots. Relate these measurement activities to mathematical measurement of a ruler on a map.
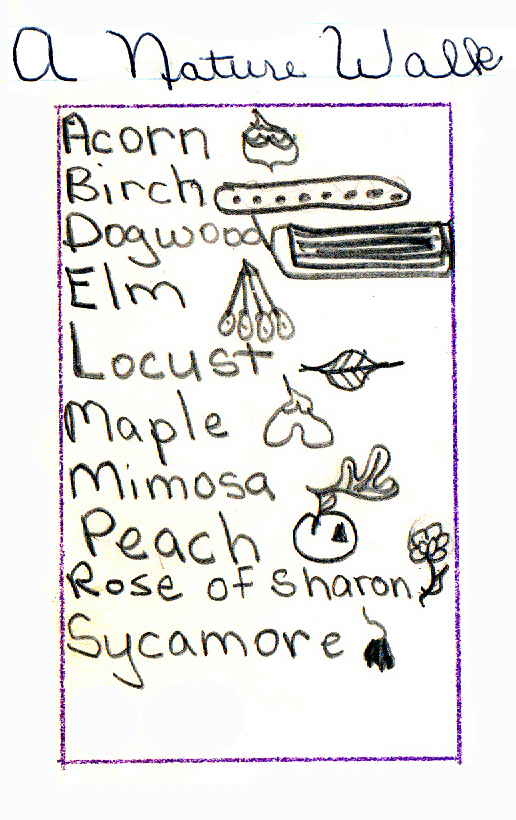
LESSON THREE: Actual Walk Related to the ThemeGive the students their first neighborhood map copies. Make sure that the maps are held firmly against the writing surfaces, in proper position with north at the top, south at the bottom, etc. Make the actual walk or walks. Using the symbols you have developed, have the students write down the points related to the theme as the class walks. At each point ask the students to look for the point of interest, name it, tell the name of the street and the part (northern, etc.) of the map the site is located on, and finally, have them draw it in. If it is too difficult or clumsy to connect the points with arrows during the actual walk, leave this activity for the final classroom mapping exercise. Similarly, there is no need to draw in or attach a key during the walk; this can be done in the next exercise on map copy number 2.
LESSON FOUR: Completing Maps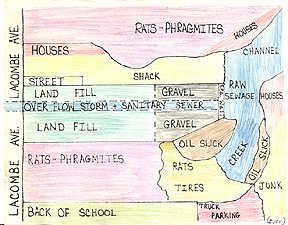
Map completion should follow the walk within 3 days. Under the teacher's direction, the students will redo the maps made on the walks. Use arrows to indicate walk routes. The arrows should be drawn neatly using a straight edge and indicate the starting point (school), route of the walk, and the end point (school). All places and/or symbols should be correctly situated on the map. If necessary, a transparency can be used to show where specific sites are located on the map. Any labeling or use of a key system should be done neatly and carefully.
Follow-up Activity:
Exploring and mapping the immediate community environment can lead to the development of an urban environmental planning unit in which advanced and upper grade students study, draw, map and build model block and neighborhood environments in their classrooms and workshops. Students can then plan to initiate appropriate actions, e.g., cleanups, housing rehabilitations, citizen awareness and letter writing campaigns, etc. to implement their plans.
LESSON FIVE: Adding a Page of Explanations to the MapsDepending on the language arts ability of the class, students should write a short composition of one or more paragraphs, explaining the map. The page of explanation should be designed so that people can understand what the walk is about, and understand what they are seeing. The page can be attached to the map when both are completed. (Some students may be able to scan their maps and integrate them with their descriptions on the computer, for print-out or Internet display.)
Follow-up Activities:
1. Ask students to write short compositions on specific sites on the walk and how they feel about them. What was their favorite part of the walk? Why? What building or streets made them feel happy? Sad? Interested? Bored? What areas would they like to walk to, map and write about in the future?
2. What about the past in relation to historical places discussed? Ask capable students to construct a picture map of their community environment as it looked sometime in the past, and to write a series of compositions related to this.